iAstroPhoto v. 1.2.1
Focus Module
Quick Start Guide
(click on the thumbnails to see larger images)
For more features, see the features page
Very Quick Start
If you cannot connect to your camera with iAstroPhoto but can take and download pictures under control of other software, you can still use iAstroPhoto.
Once iAstroPhoto is running, any new jpeg or tiff image that appears in that folder will be automatically loaded into iAstroPhoto just as if it were downloaded directly from the camera. Some points to keep in mind:
More Leisurely Quick Start
Starting Up
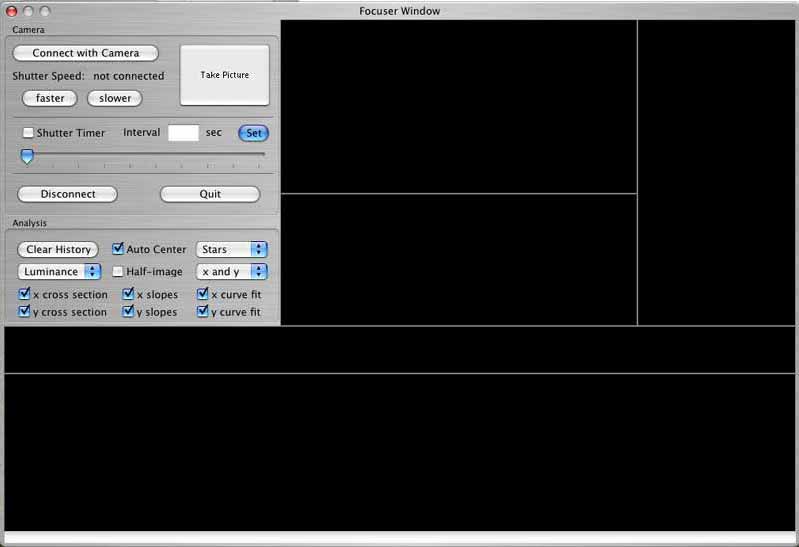
When you start iAstroPhoto, you will see the empty focus window:
Make sure your camera is
Click the Connect to Camera button. You should see the Communication Settings dialog box, listing your camera and its connection:
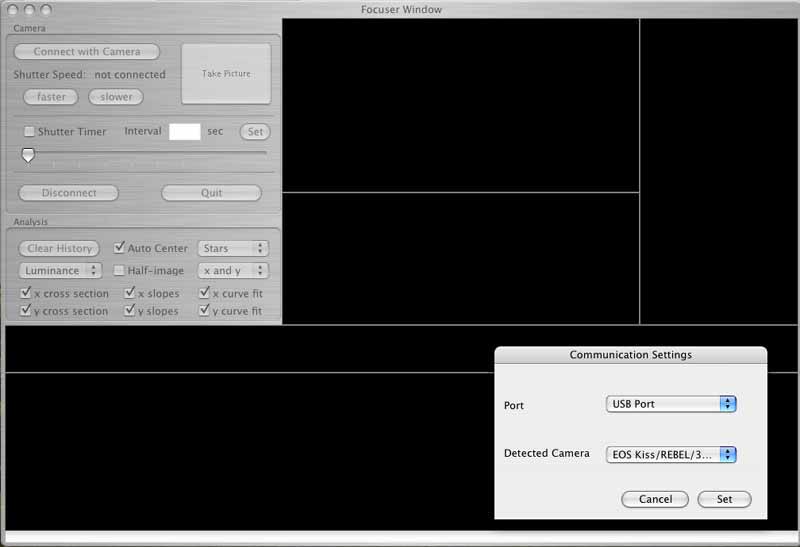
Click the Set button. After the Communication Settings dialog box disappears you should see the text under the Connect to Camera button, next to "Shutter speed", change to the current shutter speed on your camera.
The First Image
For initial focusing, you should set the image size to either small or medium and the image quality to normal in the Image menu.
Press the spacebar or click on the Take Picture button to take your first image. After it has downloaded it will appear in a new window:
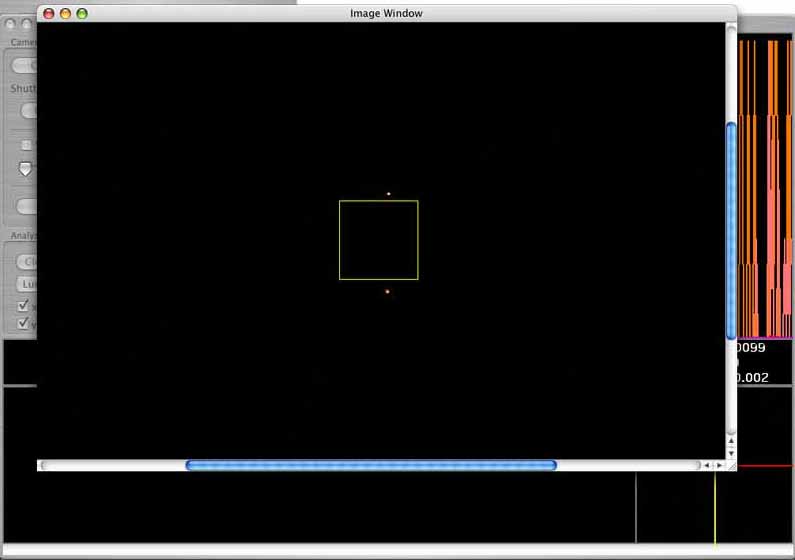
This is the standard image window. You can navigate around by clicking and dragging inside the image, or via the scroll bars. The 100 x 100 square indicates the area we will use to measure focus quality, which is called an extract. You can center the extract anywhere in the image by shift-clicking in the image.
Shift-click on the object you want to focus to select the starting extract location. The image window will disappear and the extract will appear in the history section in the bottom right of the focuser window. Various focus metrics and a graph of the x and y cross sections of the extract will also appear.
If Auto Center is selected (selected by default at startup), the extract will be automatically centered on the center of brightness. This will center a star or planet if that is what you selected, but can have unpredictable results if you place the extract in a bright area that larger than the extract.
You can see the image window for any extract by clicking on that extract in the focuser window. Shift-clicking in the image window selects a new extract location. You can also select a new extract location by shift-clicking in the extract in the focuser window, though you must make sure Auto-Center is not selected.
All subsequent image extracts will be from the same location in the image until you choose a new extract location.
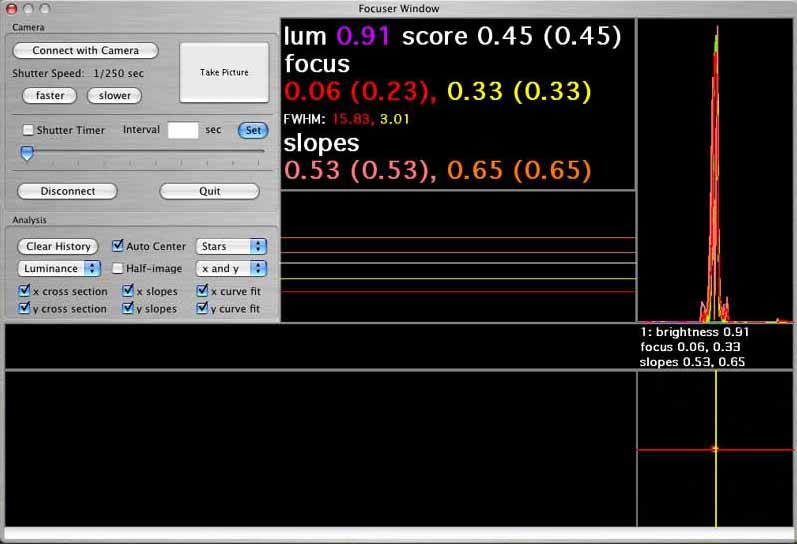
The Focus Window
The focuser window is divided into three regions: control, focus metrics and image history.
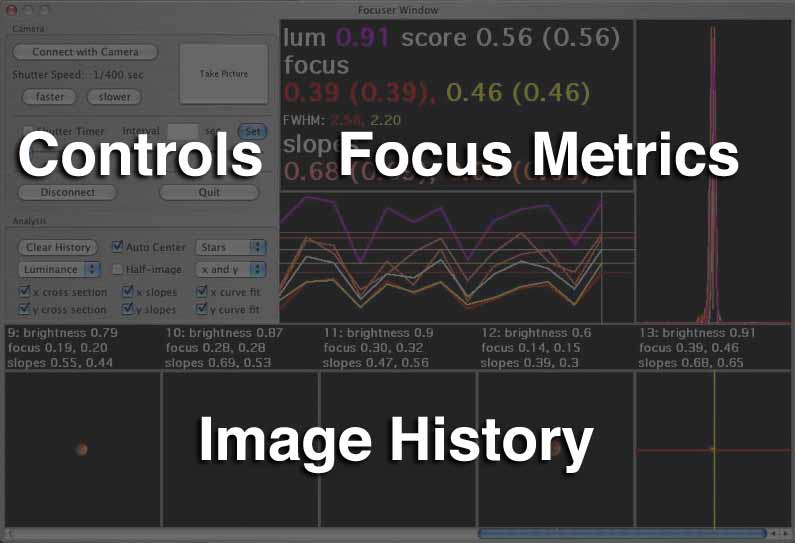
The controls and focus metrics are described in detail in their respective sections of this guide. We will cover them only briefly in this section.
As you vary the focus setting and take more pictures you build up the image history at the bottom of the window.
The most recent extract is on the far right. As you move your cursor over an extract, it becomes the current extract: its data is displayed numerically in the metrics section and its cross sections are graphed.
When the cursor is not over an extract, the most recent extract becomes the current extract.
Each extract is sampled along a x and y cross section through the middle, indicated by the red and yellow lines in the current extract. Metrics that indicate the quality of focus is displayed in the center section. These metrics are:
The score, focus and slope metrics all vary from 0 to about 1, with larger numbers indicating better focus. The numbers in parenthesis are the best values for their respective metrics in the current history.
The history of the metrics is graphed in the center of the focus window. The colors match the numerical displays, and the horizontal lines show the best values in the current history. A light vertical line indicates the current extract.
The graph display on the right contains 6 graphs:
You can turn the individual graphs on and off via the check boxes at the bottom of the control region. You can also select just the x or y graphs via the pop-up menu which starts up x and y.
The top of the control region contain connection and shutter camera controls, including a capability for automatic exposures taken at a fixed interval. Other camera controls can be found either in the pull-down menus or in the Camera Window.
iAstroPhoto can tell you the quality of focus of points (for stars) and edges (for planets), with a variety of options. Here are the best starting options for different types of objects.
Focusing on Stars
The default startup configuration is appropriate for focusing on stars. You should pick a star and exposure so that the Lum value is about 0.9. The star should be the only bright star in the extract. The settings appropriate for stars are:
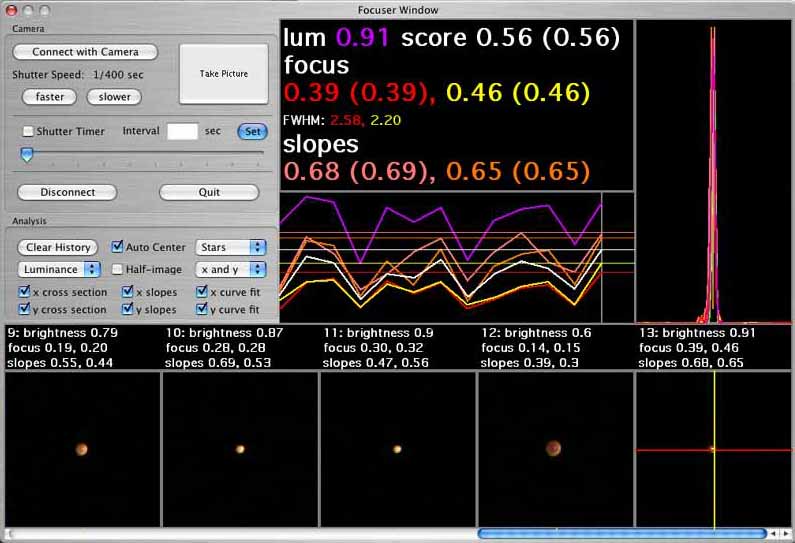
Focusing on Planets
We focus on planets by looking for sharp edges, which correspond to sharp peaks in the slope cross sections. If the planet is small enough to fit inside an image extract, we have to restrict the analysis to only one edge for the curve fitting to work properly. We do this by centering the planet in the extract and checking the Half-image checkbox. In this case the settings appropriate to planets are:
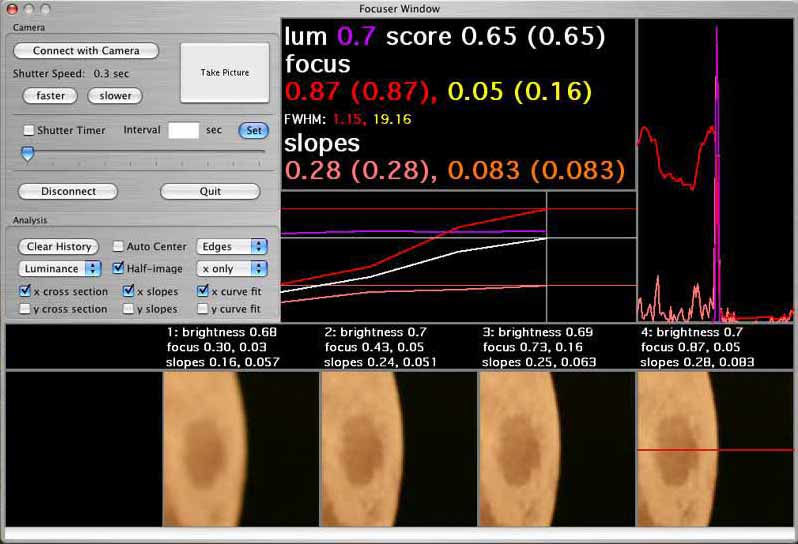
After a few images your focus window should look something like this:
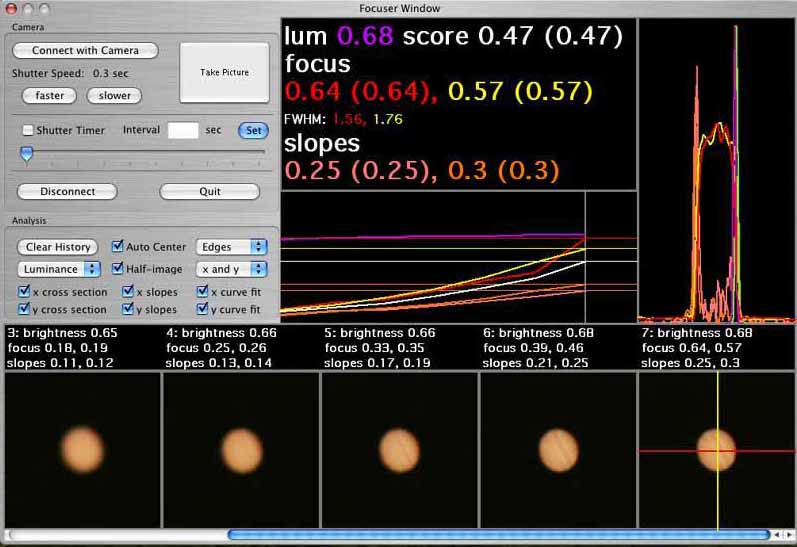
Focusing on Saturn is slightly different because the rings can confuse the curve fit by introducing several edges. You should align your camera so that Saturn's poles are aligned with the image, and then select either the x only or y only options so the single cross section goes through the poles. The other options are the same as for other planets.
When the planet does not fit entirely in the extract you should follow the procedure for focusing on the Moon.
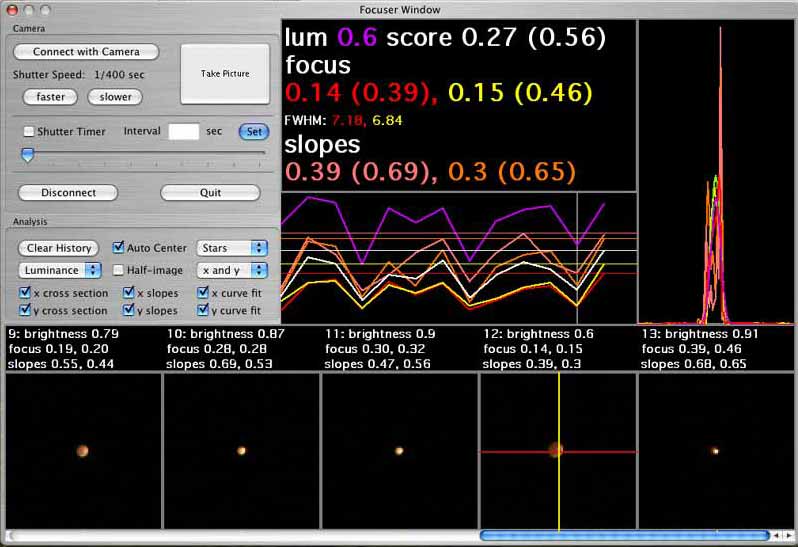
Focusing on the Moon
We also look for sharp edges when focusing on the moon, which are best found on the Moon's limb (not the terminator). The best edges are the only high-contrast edges in the view and are perpendicular to the cross section we are using. We therefore use the y only or x only setting. In this case the settings appropriate to planets are:
After a few images your focus window should look something like this: